Working with studio lights can be challenging. You have to think about types of light, number of lights, direction, reflection, strength, colour, shadows, and on top of that the most important part of the shoot – your model.
If you work in a studio often enough, or this is your primary habitat, then quite often you fall in a trap of using the same setup again and again. It becomes boring, your images look the same from one shoot to another.
I believe it is always necessary to keep on learning and experimenting, whether you are a studio pro, or a complete beginner. So today I decided to share a few studio light schemes I love using for my shoots. Besides just the explanation I think it is good to see the diagram how everything is set up and the final result. And I’ll keep on updating this post with more creative light setups. So stay tuned and bookmark this page 😉
Shaped light beam of a bare flash light
For this setup you’ll need a single flash light and two black flags to modify the light. Set up the flags to shape the light that your subject is highlighted and you get a nice shadow behind her that gets into the shot.
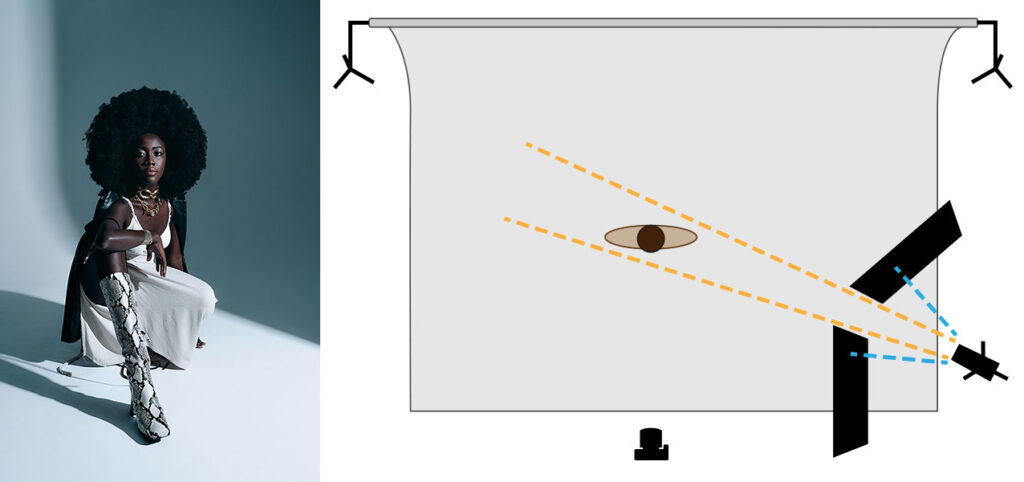
The beauty of this setup is that you make use of the backdrop and play with shadows adding that extra depth and character to your shot. The reason for not using any modifiers on the flash is to prevent light from getting too defused, because we want to have those crispy shadows behind the model and on the backdrop.
But, there is always a catch. You have to be aware of the harshness of the light, that would expose any imperfections in your subject’s skin. So make sure your makeup artist is well aware of your plans and prep the model accordingly.
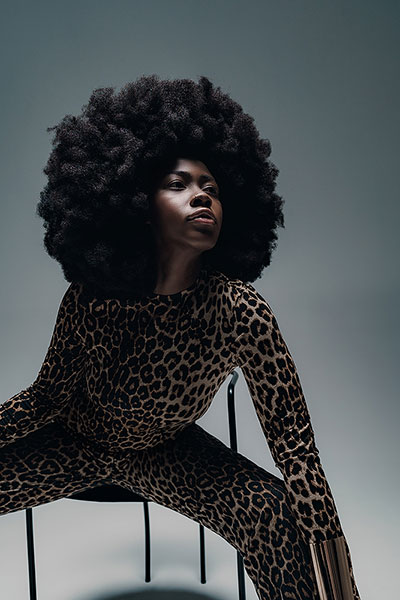
Soft narrowed light
This is a perfect setup in case you want to have a darker image with plenty of depth. Here we use a single flash light with a medium or large softbox, plus a black flag to block almost all the light (around 90% of the softbox). Place your model in the remaining light. Because the flash light is positioned at the angle towards the model, there is almost no light reaching the backdrop behind the subject. This is how you turn your white backdrop into this nice rich dark grey background.
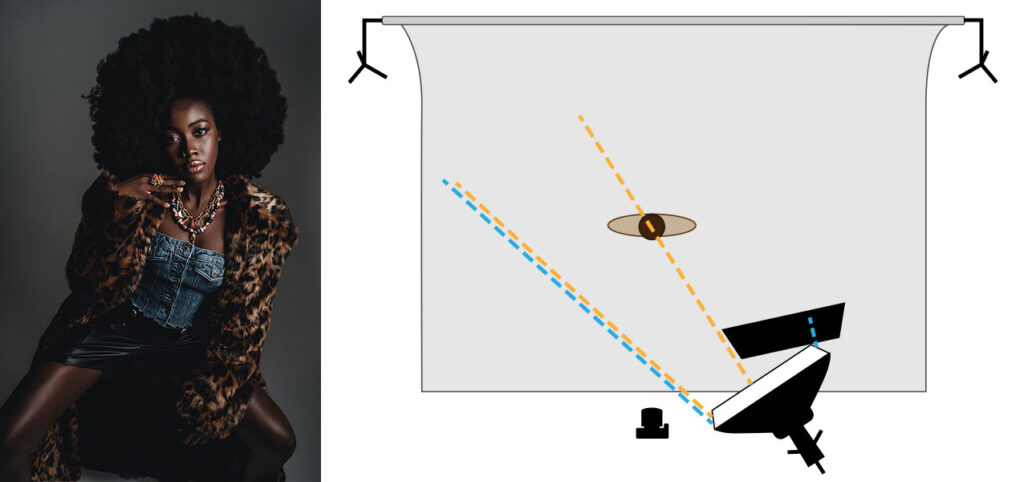
I love this setup especially for portraits and close-ups. Due to the direction of the light you get plenty of depth in your image.
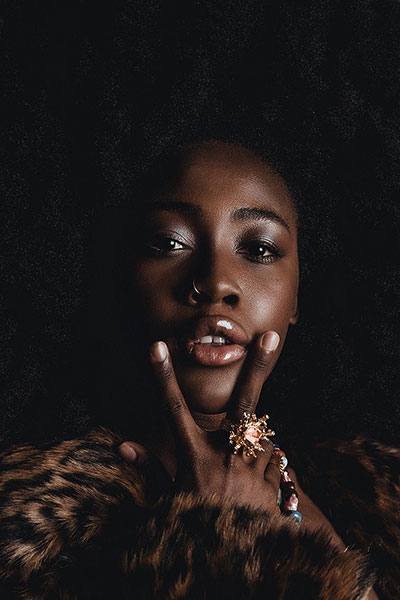
And it is relatively easy to setup scheme in almost any conditions with minimum technical requirements. And of course another great win here that you can have different kinds of images produced in a very short period of time (if your studio time is limited) without the need to swap backdrops.
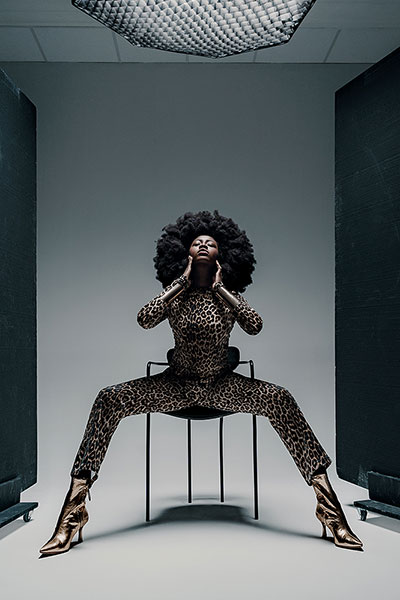
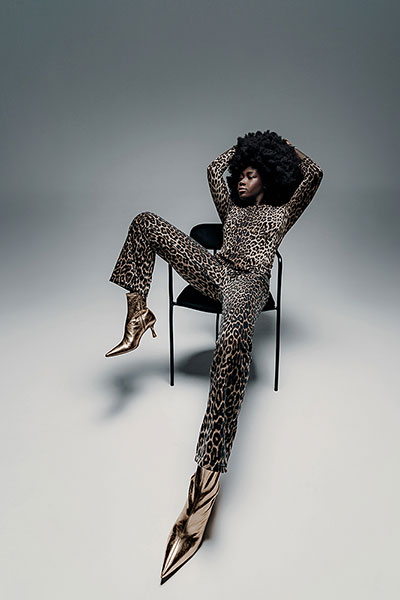
Octobox from the top
This is a small riff on a classical setup. So what we have here is a flash with a huge diffuser (in our case a large octobox) shooting at the subject straight from the top. Because white backdrop and a large softbox light would will up all the space and bounce back on the model from almost all directions, leaving only shadows under the nose, lips, and eyebrows.
This is why we added here two black flags from each side of the model. This way we prevent light from travelling further and getting more shadows on our models cheekbones.
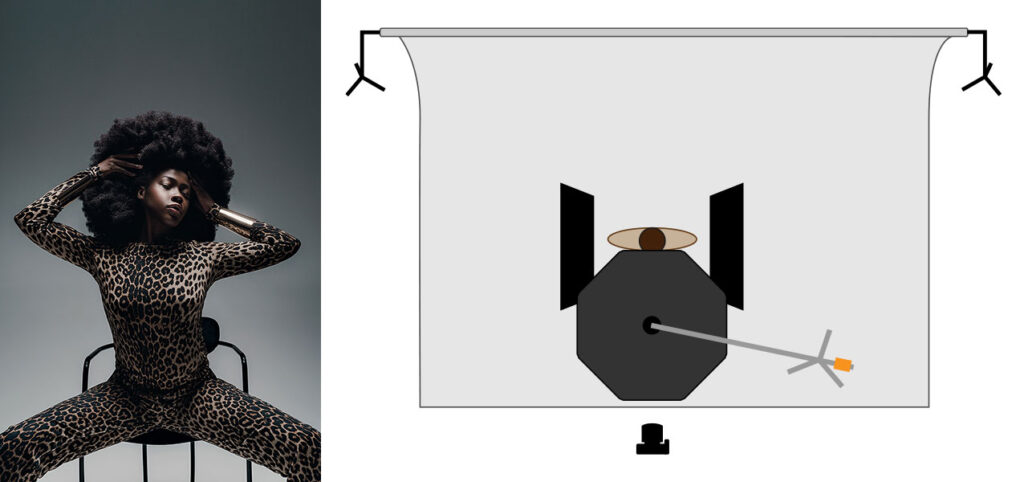
And with this setup when the light is traveling from the top to bottom you get this beautiful gradient in your backdrop going from dark grey to almost white.
This setup works well for portraits and also full body shots. Here you can see I used different lenses for these shots, a wide angle one, and a portrait lens.
Keep in mind though, that when you use a wide-angle lens you might find yourself in a challenging situation when you get flags or a softbox in the frame (unless this is what you are going after).
And don’t forget, your successful photoshoot is not only about the studio, fancy flashlights, props and backdrops. A lot depends on your model, how she or he poses. And you, as a photographer, need to know what works well and what to avoid, especially if you work with not professional models. Together with our team I made a guide outlining your typical does and don’ts when it comes to posing.
I always say that it is all about practice. Knowing is one thing, but being able to execute is completely different. So go ahead and try these schemes out and please tag me in your results on Instagram @FashionPhotoLab.
For guys in the Netherlands, a little heads-up. Next year we’ll organize a fashion photoshoot workshop in one of the best studios in the country. So if you want to be the first on the list to participate shoot me a message at info@fashionphotolab.com and I’ll add you to the waiting list.
And if you want to learn more photo tips and tricks, please sign up below and I’ll be thrilled to email you once in awhile all the cool stuff we are working on, latest learnings, trends, freebies, and much more 😉