I live in Amsterdam, a beautiful city that offers a lot of absolutely stunning photo locations. But what it is also famous for is the weather. Besides being often very unpredictable and having the tendency of changing almost every 15 minutes, we have a lot of grey days. Especially from fall to spring. So if you happen to live in the Netherlands or are quite familiar with such weather, knowing how to shoot in depressing weather is an essential skill for any photographer. In this post, I’d like to share with you a few tips on how to have a successful photoshoot in gloomy weather.
Tip 1: Use natural light
In gloomy weather, the light is soft and diffused, which can be great for portraits and close-ups. Avoid using artificial lighting if possible, as it can create harsh shadows and reflections. Instead, find a spot with even lighting and position your subject. You can also use reflectors or bounce cards to add some fill light and bring out the details in your subject’s face.
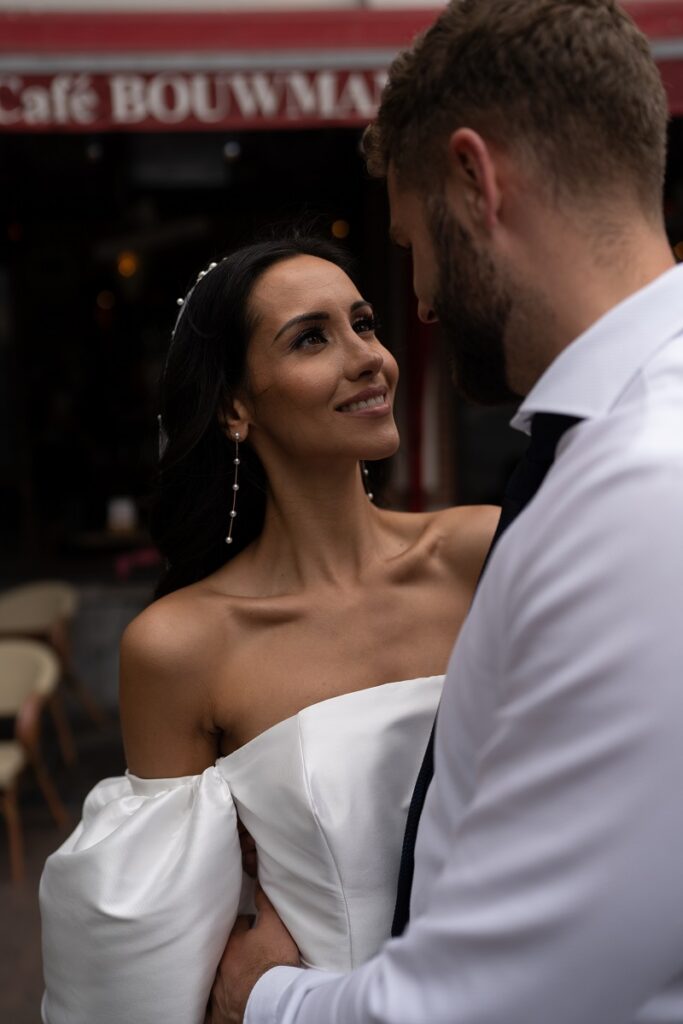
Tip 2: Avoid the sky
When shooting in gloomy weather it is difficult to achieve a beautiful blue sky and find some stunning clouds. What you can do though is avoid the sky altogether. Position your model(s) in front of a building when cropping the sky from the image completely. This way you get all the benefits of well-diffused natural light, while not allowing undesired sadness into the frame.

Gloomy weather can create interesting textures and colors in the background of your photos. Look for areas with interesting foliage or architecture, or try shooting in urban environments where the colors of buildings and street art can pop against the grey sky. You can also experiment with different angles and perspectives to capture the mood of the scene.
Tip 3: Adjust your camera settings
When shooting in gloomy weather, you may need to adjust your camera settings to compensate for the low light. Increase your ISO to make the camera more sensitive to light, but be careful not to go too high as this can result in grainy and noisy photos. You can also use a wider aperture to let in more light, but this may result in a shallower depth of field.
Tip 4: Bring props and accessories
If the weather is particularly gloomy and your photos are lacking color and vibrancy, consider bringing props and accessories to add some interest to your shots. Umbrellas, hats, scarves, and jackets can add texture and contrast to the scene, while colorful accessories like jewelry and bags can provide a pop of color.
Tip 5: Edit your photos
After your shoot, you can enhance the mood and atmosphere of your photos by editing them in post-production. You can adjust the exposure, contrast, and saturation to create a more dramatic and moody look. You can also play with the color balance and tint to create a unique and stylized effect. I personally use Adobe Lightroom and Photoshop for all my post-processing. If you are interested in my techniques, check out my online training where I show all my tips and tricks on how to organize your work and achieve a truly professional look in your photos in Lightroom and Photoshop.
Tip 6: Be flexible
Finally, it’s important to be flexible when shooting in gloomy weather. The weather can be unpredictable, and you may need to adjust your plans or location based on the conditions. Be prepared to reschedule or move to a different location if necessary, and always have a backup plan in case the weather doesn’t cooperate.
In conclusion, shooting in gloomy weather can be challenging, but it can also be a great opportunity to create unique and interesting photos. By embracing the mood, using natural light, adjusting your camera settings, looking for interesting backgrounds, bringing props and accessories, editing your photos, and being flexible, you can capture stunning and atmospheric photos even on the gloomiest of days.